In today hair session it was my last time to practise on my partners hair for her design. I had to make sure I could complete the whole design and that it was looking neat and secure. In each hair design iv'e practised on Beth Iv'e used the same padding in the hair. The padding is a circle shape and is filled with couch roll, we was going to fill it with something a little softer so its easier for me to put the grips in however if the padding is softer where Beths hair is so long and heavy we thought nothing else would hold the weight of her hair up, after this decision we decided to keep the same padding.
 I started with sectioning the hair off, I left hair at the front to create the wiggle plaits and also hair to cover the final bit at the front of the beehive. In Beths design she wants averagely 8 wiggle plaits all together at the front, this was 3 plaits going up the beehive each side (6 all together going up) and 2 crossing over framing the front of the face. Once this section was out of the way at the front I then started on creating the beehive. Most of my time is spend on creating and structuring the beehive as there is so much hair and its so hair I have to make sure its all secure and gripped down. I placed the beehive directly behind the parting of the front section and starting pull strands over one by one to secure the bottom layer to the head and the padding. I then gathered larger sections of hair and gripped it all into place and just left 4 strands at bottom.
 I then separated the bit at the front that I left when I sectioned the hair at the beginning and started building that up at the front of the beehive, this was just to cover the front and make sure it looked neat and the padding wasn't showing. I then took down the next layer I separated which was for the wiggle plaits and I started grouping them into threes to create the plait. I started with the middle 6 and created all the wiggle plaits and gripped them to the top of the beehive. With the 2 outer plaits I brought them both across to meet at the middle and gripped them in place.
When I put the wiggle plaits on the beehive I was left will a few strands left hanging over the back, normally I just clip them in and in Beths design they are just gripped to the back. However I asked her opinion if I could change the design slightly and plait the strands and grip it to the back so it looks more interesting and elaborate at the back.

Next was working on the final 4 strands at the back of the head. Like the previous design I wrapped the strand around my finger and gripped it to the hair, this looked like flat curls on the head, Quite similar if I was using curling tongs. I created the 2 outer ones at the bottom and the 2 middle ones a little higher. Finally the last Elizabethan touch to the hair design was pearls, we bought some pearls with holes in them this way we could put a grip through the hole and grip it into the hair. I placed the pearls in the 2 front wiggle plaits that met in the middle, this gave the final touch to the design.
 |
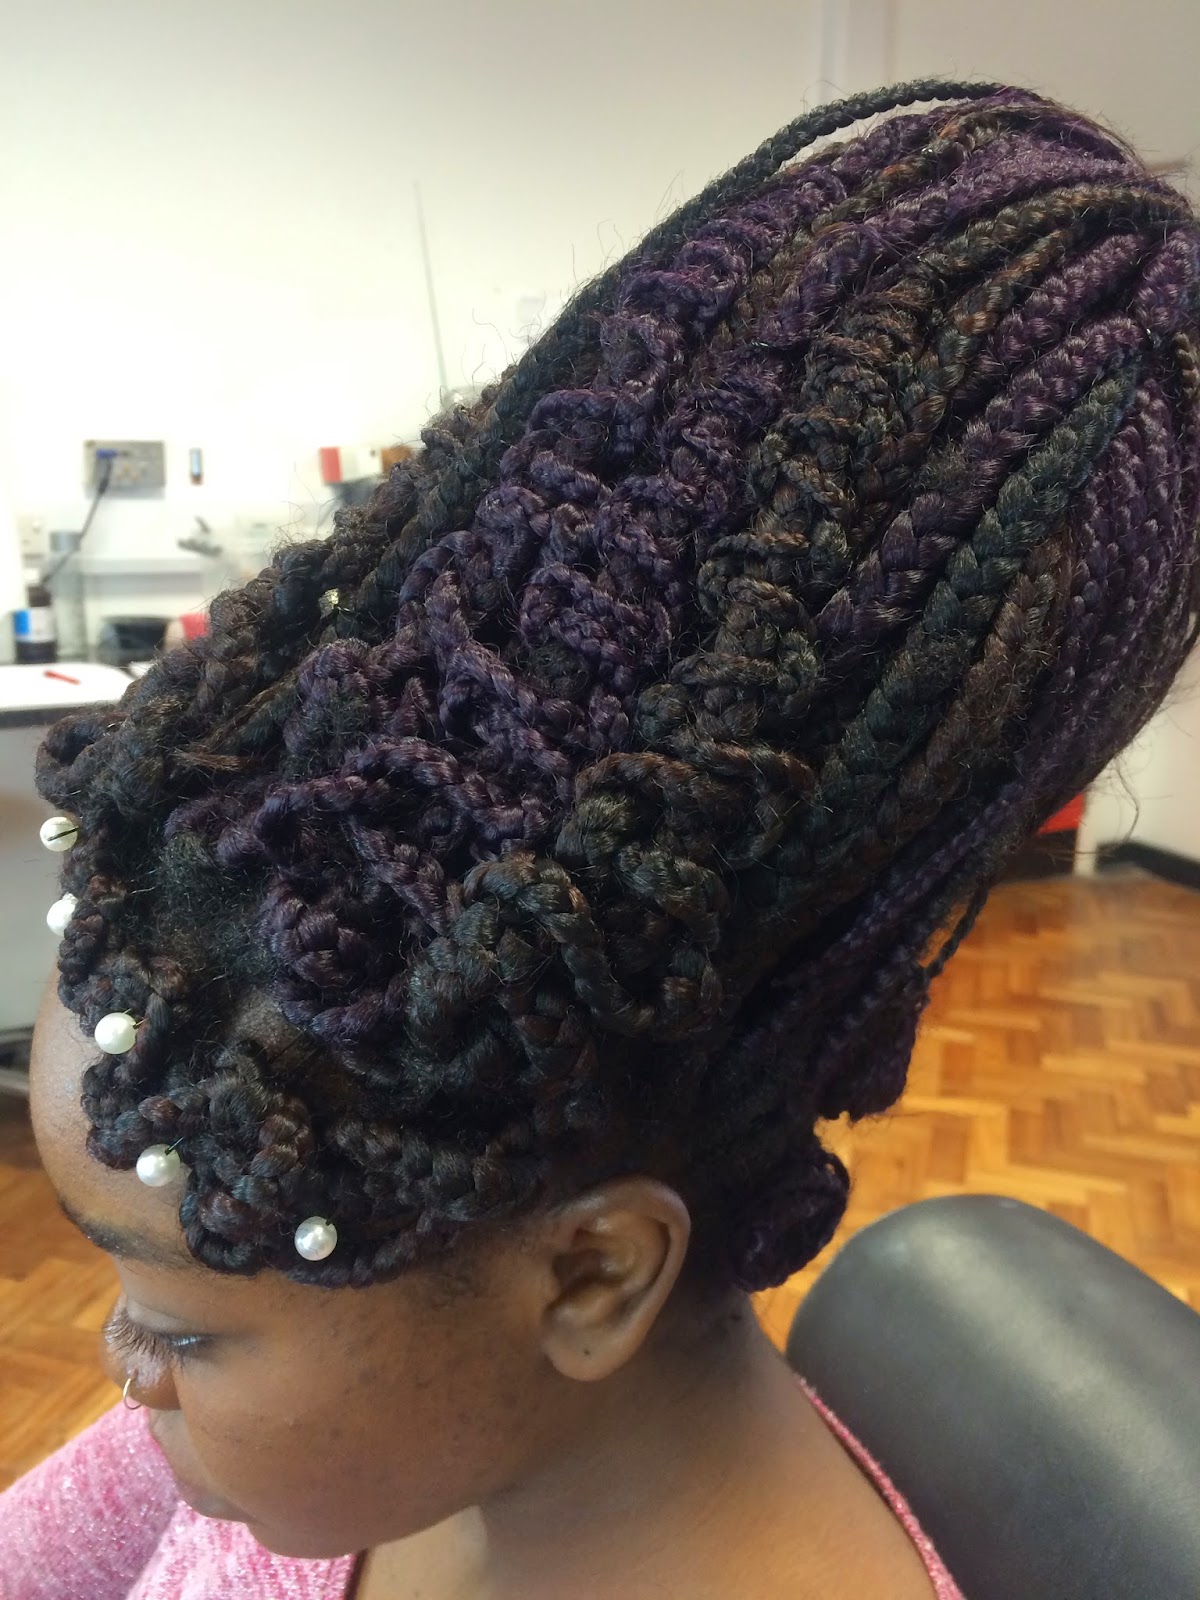
| side/back |
 |
| top/front |
 |
| front |
 |
| RSide |
 |
| Back |
 |
| Selfie with my partner |
Overall I'm very pleased with the outcome of this design as I definitely think its the best one iv'e created so far. Each piece of hair went perfectly well and each technique went to plan. The beehive is the hardest thing to tackle as It needs so much structure and work to keep it up. The hardest this is getting the pins in the hair as that is a little bit of a struggle because I have to put so many grips in and the hairs so thick and layered up its hard to put them in the hair. The rest of the design went really well and I think for a complete hair design the outcome came out really well. My timing for creating this was 1 hour and 30 minutes, I need to cut my time down slightly however hopefully on the day If I just work at a faster pace then it should all go to plan.
Historical Elizabethan Hair comparisons to the design I'm creating
 |
http://www.pinterest.com/pin/83598136803406647/
I think this 16th century beehive represents the historical hair design that I have created from Beths Design.This beehive has a similar hight to the hair which is incorporated into this design. Beth hair throughout will always look contemporary because of the texture and type of hair she has. Each individual plait gives a texture to hair with black, purple and brown running through the hair. |
 |
https://ndla.no/en/node/98522?fag=42&meny=101439
The flat pin curls at the front of the hair are very similar to the 4 pin curls I created the the bottom back of the hair. The technique is very Elizabethan however the hair style and type makes it very contemporary. This design also contains pearls placed on the top of the hair design and framing the front of the hair, again this element is in the hair design I created. |
 |
http://ladiesof2318.wordpress.com/2011/09/12/thumper-elizabethan-research/
This historical hairstyle has been re-created in modern day however has completely created a tradition Elizabethan hair design. The pearls and pin curls are a comparison to this historical design and my contemporary Elizabethan design. |

No comments:
Post a Comment