Sunday, 23 November 2014

Working Further on my Partners Hair design

In my recent hair studio lecture it was my turn to practise my partners design on her hair. By now I feel much more comfortable working with her hair and I'm picking up a much quicker pace. Beth hadn't got a final drawing of the hairstyle she wanted me to create however she had a collaboration of photo to show me. As in the previous lesson we experimented with the technique 'wiggle plait' and Beth really liked the technique and how it looked in the hair. Beth described to me how she wanted it too told and said it was pretty similar to the previous design I created on her. 
I started off with using the rat in the hair, this is exactly the same padding that was used in my previous design for the wiggle plait. Its just a ball of couch roll which has been put in a pair of tights. In the practise session the tights were a tan colour however on the day of the assessment I want it to be black so it matches the hair and blends in more in the design. I started with sectioning the front area were the wiggle plaits would be, each wiggle plait needs three strands of hair so I sectioned it off in three's. I then sectioned another area which I will use to cover the front of the padding. Once the front sections were out the way I placed the rat on the top of the head and started building up the hair over the rat and gripping it through the padding and securing it to the hair closest to the scalp for security. 
After I placed a decent amount of hair over the padding I realised I placed the rat to far back on the head and it was leaning back. I then had to go back and un grip all the pieces of hair that I had already gripped up and start again. This time I moved it up slightly and started to grip all the pieces of hairs up again. I start with stand by stand to secure it to the head and the padding and then I started grabbing three strands of hair at a time and bringing it all over and building it up. I've learnt from the first time I worked with Beths hair as I tried to put too many pieces of hair up at once and eventually its too heavy and not secure so it just falls. I've learnt from this mistake and realised I have to build the beehive up bit by bit to make sure its secure. Once al the hair was up in a beehive I left four strands of hair at the bottom and I still had the strands at the front to create the wiggle plaits. For the this I grabbed the three stands of hair, plaited it loosely and with the two strands on one side, I pulled them upwards to the roots of the hair to create the wiggle effect.
I created five main wiggle plaits in the centre which were gripped up at the top and two on each side by the ear which were brought around to the middle of head and gripped in the centre to the other wiggle plait. All the plaits and beehive were gripped with black bobby pins and wide set black grips as well. 

With the final 4 strands I left at the bottom, I wrapped the hair around my two fingers and gripped them to the roots of the hair. I did this with each strand so it created four twists at the back of the bottom of the hair. This wasn't originally in Beth design however instead of leaving the bottom bit down like in the last design we decided to add another technique to the design. I think this makes the hair look more Elizabethan as when the hairs down it looks very contemporary.


Overall I'm very happy with the design and I think it came out very well, the part that takes the longest in the hair design is creating the beehive this is because it takes structure and time to place each bit of hair up. Iv'e definitely become quicker at working with the hair which is good progress and I've become more confident. On the final assessment I think I need to present the wiggle plaits a little bit neater and try and get them the same size, however this is hard because each strand of braid in Beths hair varies. I think with the twists at the bottom of the hair could be neater and more secure as they felt a little loose. And of course the padding to be black to match the hair, overall I'm very hair with the hair design and it look me 1 hour and 10 minutes to create the final hair design so I do feel confident for the assessment as long as everything goes smoothly. 


Tuesday, 18 November 2014

Mood Board of Hair Design for my Assessment Partner


Here I have a variety of inspirational Images that make up my final hair design which my partner will create on me. I have included photos that show similar techniques that will need to be used to complete my hair design and also similar style and shape. My photos contain images from Historical Elizabethan hair designs as well as ones from recent high end fashion runways and also contemporary Elizabethan hair designs. This show my variety in the historical and modern designs and also the variety in my use of technique and style. 

http://careforhair.co.uk/hairstyle/braids-plait
http://www.hji.co.uk/hair/14-springsummer-2015-braids-copy-catwalks/
http://www.itslavida.com/the-return-of-the-plait/
http://beautyhigh.com/chanel-prefall-2013-hair-heights/
http://www.pinterest.com/zitong/fashion-chanel-pre-fall-2013-edinburgh/
https://blogger.googleusercontent.com/img/b/R29vZ2xl/AVvXsEj0y5cvYMZ-amGOJO73O1Clxt3IgiobX1MwxyXump2K9EXZZ46FRbTPfK6ZGbw-Ic5CYwcTTuBfJ1nY_eVfiEnASBGD1-uJ46BzxHnhr2H8bg1JwICA6qq38-fB1l-6w9LArG00elsulnLo/s1600/heart-shaped-funny-vampire-hair-styles-girls.jpg

Monday, 17 November 2014

Practise of my Final Design- Assessment Partner creating my design on me

Since my assessment partner last created my hair design, I have decided to stick with that same design as I like it the best out of the three final design I drew up. I think is has the most potential out of my three designs and contains a variety of elements that are techniques that were used or represent the era of the Elizabethans. My design contains a variety of skills we have learnt and practised on each other over the past few weeks. My design has frizzing/crimping, plaiting/French plaiting, heart shaped beehive with padding and a bun. Most of these are elements and techniques the Elizabethans would of used and I created a contemporary design from the era that shows history and modern influences to the design. 

In our assessment practise lesson today my partner, Beth, yet again created the hair style with the improvements added in. Beth started with crimping the hair which still took 45 minutes to do the whole head. She then started sectioning the hair and created all the plaits making sure they were all sectioned equally and were plaited neat. After the crimping, she brushed through the crimping and started with the plaits, from the moment of brushing my crimped hair to sectioning and plaiting all the head this took her again 20 minutes. Beth did not rush creating the design we tried to time everything perfectly at a good pace so the design was neat and accurate. This time she added the rats in, this was one on each side of the head to create the heart shape. She tried to get the padding equal and symmetrical on each side and for them to be the same height. Once the beehive was done she had to create the bun which this time I wanted it larger than before. She started with putting all the hair up in a pony tail and then back combing it from the roots, she sectioned the hair in fours, rolled the hair over and gripped it to the base of the hair, then spread the four parts to blend into one large bun and gripped it in place. Overall the beehive and the bun took 25 minutes to complete. Overall the design took Beth 1 hour and 30 minutes to complete. On the day of the assessment we don't want to rush the design, because sometimes rushing can potentially ruin the hair design itself. Therefore when asked by our lecturer if we wanted any time before the assessment to prepare the hair we said yes, before the assessment Beth is going to crimp my hair in preparation to create the rest of the design. This means when completing the design on the day, created the plaits, bun and beehive should take Beth her normal 45 minutes to create the rest of the design, this will then give her plenty of time to achieve neat cornrow and the perfect symmetrical heart shaped beehive.

After Beth created my design I was very happy with the overall look of it, it felt very secure on my heat and was very neat. The bun was a much better size and I preferred it bigger and the same for the beehive. When thinking about my design during the creation I was thinking about including some pearls to the hair design, I thought it would look nice if there were a few pearls pinned into the bun at the back of the hair just to give the design a slight more of an Elizabethan feel and also using an accessory.

On the day of the assessment I need to make sure to bring pearls for the design that will create on me, I will bring my own rats for the beehive. The grips, hairspray, hair band and crimpers will be in the studio on the day we just need to ask the lecturer to supply them for us before the assessment begins so we are prepared. On the day I will need to bring in my drawn up design of the hair style, a step to step guide of how to create it and maybe additional photo showing the design I want in case the drawing isn't clear enough. Apart from that the combs and brushes will be supplied from Beths hair kit that she will need to bring on the day. 

Overall I'm very happy with the outcome of the design I think Beths matched it up very well to my drawing and its exactly what I wanted it to look like. I think the assessment day will go to plan as we have practised it once, created the final thing once as well and she has already seen my design plans before hand and the explanation of the design


Assessment Partners First attempt at One of my Hair Designs


This was design two from my last blog post, this design had some extreme plaiting incorporated into this contemporary Elizabethan hair design. The basics for this design was two cornrows parting the middle of the hair at the front, braided all the way down to the front of the forehead, down the side of the head and up to the bun. At the would be 4 cornrows separate that would be braided to meet the bun in the middle, so when looking at the back all together there should be 6 plaits and on the top would a heart shaped beehive. 


My assessment partner; Beth was able to have a look at the designs I drew for the assessment, we eventually chose to go with the one that has the cornrows coming up the back which two of them originally started in the middle of the head and framed the hairline all the way round. When practising hair designs with Beth I noticed that she was very good at cornrows, therefore I definitely  wanted to add a hair design around it. In the Elizabethan era plaiting the hair was very popular and today the modern twist of a plait is probably the French plait as its a little more difficult to do. 


As soon as the studio lesson started we go right into the design where I briefly told her what I wanted it to look like and showing her my design I drew and also the photos that gave me inspiration to create the design. We wanted to use this session to find out how long each section of the hair took and what could be improved in my design, including feedback from the teacher. Beth started with setting up our work station and  began with crimping my hair, after this was completed she sectioned the line of where the cornrow would be at the front and clipped the rest of the hair back. She started on one side and plaited from the middle, down and all the way round. 

Then she started at the back where the cornrow would be going upwards, I had to sit with my head facing the ground so she could plait them all upwards. We realised we were coming close to the end of our lesson when Beth started creating the heart shaped beehive. Therefore when creating the beehive she didn't get enough time to put in the rats to give height and volume to the beehive. Instead we proceeded on without the padding this time just to see the overall design. Finally, she pulled the rest of the left over hair all together and put it into a bun. 

Overall the crimping of the whole head took 45 minutes, the cornrow took 20 minutes, and the bun and beehive took 20 minutes. However next time we need to include the padding to the beehive. During the real assessment we will have around 1 hour and 20 minutes to complete the whole design, however on the hair before hand you can prep the hair ready for the assessment to cut down on timing. Improvements I would do to this hair design for next time is I would want the bun to be a little bit bigger and voluminous. We will definitely make more time in next lesson to include the padding in the hair so that the beehive is bigger and more secure. Next attempt we definitely need to time each area properly so that on the day we are completed in good time and also see what hair preparation we want to complete before the assessment. Overall I think Beth executed the Elizabethan hair design I drew very well and came out how I wanted it to look. We have a few things to tweak on the design however overall I'm very satisfied with the outcome.


My Three Hair Designs for my Assessment Partner to create on me

Three Potential Final Hair Designs for my Partner to Create-

 Design 1-
In this contemporary Elizabethan hair design I was sure that I wanted to incorporate some kind of French plait into my design. I started with how I wanted the back of the hair, which was the cornrow coming up the back of the head and then pulled into the bun. For the middle section of the top of the hair I wanted one singular braid going through the middle and joining the bun from the top. Both of the inspiration for the braids were from the Chanel catwalk as they go all out for the braids on the runway.

 Firstly I want the hair to be completely crimped, this is because I know my hair is thin and crimping it will give it that extra volume to work with and also will give the frizzy, curly effect the Elizabethan tended to have in the era. For the beehive on top I wanted it to be a heart shape and this would separate in the middle were the braid would be. All the hair from the rest of the beehive and the ends of the plaits would be all brought together and put into a frizzy bun. In the hair style I have incorporated contemporary and historical hair techniques that would of been used in the era and the modern day. The equipment needed to complete this hair design is, crimpers, bobbi pins, wide side grips, rat, hairspray, hair band, hair brush and a pin tail comb. 


Design 2-
 For this design I went a little harder with the cornrow design just to give my partner a little challenge with the hair. For this design, you start with crimping the whole head to give it volume and thickness. Then in the middle I have included two cornrows that separate to create a parting, the plait starts from the middle of the hair, braided down forwards to the forehead, down and around the ear and up to meet the back. This is on both sides of the head and the plait in the middle of the scalp is in two so it creates a middle parting. At the back of the hair again is the cornrow which starts at the bottom of the hair and works its way up to meet up to the bun, at the back all together there should be 6 plaits. At the top of the hair I want a heart shaped beehive again this to be separated by the two plaits in the middle of the head, each beehive will stand on each side of the head. The left over hair from the beehive and the ends of the braids will all come together in a frizzy bun. The equipment needed to complete this hair design is, crimpers, bobbi pins, wide side grips, rat, hairspray, hair band, hair brush and a pin tail comb. 


Design 3-
For this design I created it quite elaborate at the bottom and simple Elizabethan at the top. For back of the hair I want the braids coming up the back, this time a little higher than the other designs because there wont be a bun there this time. The whole head will be crimped to give that frizzing Elizabethan feel, once all the back braids have been plaited upwards the the top of the head, its need to be held in place while the egg shaped beehive gets created. The beehive will be oval and quite large with the frizzy texture to it, the few ends of the plaits and the hairs at the back will have to be pulled up and put into the beehive as well as there is no hair left down in this design. I left the front a little simpler this time as its just one large crimper beehive that has a lot of height and texture. In this design I want pearls to be added to the front of the hair just to give an accessory to the hair and minor detail at the front of the hair to give an Elizabethan feel. The equipment needed to complete this hair design is, crimpers, bobbi pins, wide side grips, rat, hairspray, hair brush, pearls and a pin tail comb

Sunday, 16 November 2014

Inspiration for Contemporary Plaits


THE PLAITS OF 2014


Whats in this year on the catwalks.. plaits of every shape and size. 

Say goodbye to bad hair days, and hello to your go-to quick hair fix – the plait. Featured on the Aw14 shows of Jean Pierre Braganza, Marc Jacobs, Marchesa and Alexander McQueen, the plait is back! Usually associated with school-girl hair, the classic style has received a grown-up make-over and is the saviour to your last minute hair stresses.

From dishevelled styles at Jean Pierre Braganza, neat braids in centre parted hair at Marc Jacobs and rows of French plaits on the crown at Marchesa and McQueen. Whether you opt for a French braid, pigtail plaits, or an up-do, a quick braid is the easiest way to give your hair an AW update. A look that’s low maintenance, quick and easy and won’t heat damage your hair, sounds like AW hair perfection!


The beautiful bohemian braid. Created by Darren Ambrose and the Wella Professionals team, this matte textured look shows that catwalk plaits can be pretty and wearable. The braids part down the middle of the hairline and forms down the side of the head and is then put into the messy bun which contains another large plait.

The pristine-section-plait at Teatum Jones. Inspired by Nina Simone and created by Bianca Tuovi, this style sees intricate sections of thick braids that pulls up together into a bun.


The 360° braid. At Bibhu Mohapatra, Amit Abraham created braids with a bit of everything for appeal at every angle. Leather bands were woven through the top sections, a swirling bun took pride of place at the back, sleek sides provided contrast and a headband made an impact at the front. This particluar plaited hair style I feel is very contemporary elizabethan. The way the plait parts down the middle of the hair and incorporates into the bun, this style contain many influnces and techniques used in the Elizabethan era.
The post-tornado fishtail by Orlando Pita for Michael Kors. Session stylist Orlando described it as how hair would like after a tornado. In reality, volumising spray and a big fat tong were used to achieve the grunge texture.

The chain-link look by Eugene Souleiman for Wella Professionals at Donna Karan has been a social media sensation.The four-strand style required two hands, twisting and crossing each length in the style of a 90s friendship band.


Plaits can be very easy and a great way to get your locks off your face. However some types of plaits or braids can be quite elaborate and look very sophisticated. In relation to plaits and the Elizabethan era, plaits were very common in the hair and were easy to do. If I wanted to incorporate a plait into my design and make it contemporary I could create a French plait in the hair and this could be worn anyway and plaited in any direction. Here I did a mini study on looking into contemporary plaits that have been used on the catwalk by many designer this year. I really like the different variety of French plaits, braids, fish tail and twist you can incorporate into a hair design. The main feature for my hair design I want it to be some kind of french plait that is incorporated into the contemporary Elizabethan hair style.


http://www.hji.co.uk/hair/14-springsummer-2015-braids-copy-catwalks/
http://www.itslavida.com/the-return-of-the-plait/


Friday, 14 November 2014

Contemporary Designers Influenced by the Elizabethan Era

Vivienne Westwood


Gian Paolo Barbieri – Vivienne Westwood – 1997
http://www.norestfortheobsessed.com/photo/2014/eduard-planting-presents-arte-e-eleganza/

Vivienne Westwood entire look in the photograph represents queen Elizabeth 1 herself. Her whole style in this photograph is very Elizabethan her hair is up in a round beehive which is styles with waves and curls going through the hair. This hair style completely shouts out Queen Elizabeth as she would often wear a hairstyle similar to this. Her clothing is obviously a modern interpretation of the era as she has a high collar at the back of her gown framing her hair and face, Queen Elizabeth would often have clothing similar to this such as large collars and ruffs around her neck. Her necklace is made from pearls which was a popular jewellery in the 16th century often worn by the riches and Queen Elizabeth herself. Her position and face expression looks similar to the portraits of Queen Elizabeth 1, this is because she's direct to the camera, her hands are held together in the middle, and she has a very straight forward plain face for the portrait. 


Alexander McQueen


https://kennydavisdesign.wordpress.com/category/fashion/


http://s2.hubimg.com/u/8062187_f260.jpg

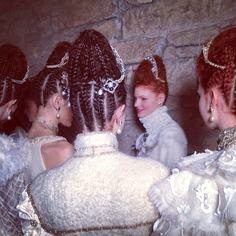
Alexander McQueen Fall/Winter 2013, Although this collection’s concept isn't by McQueen himself, it embodies his personal aesthetic and was created by Sarah Burton on the behalf on McQueen. Burton’s collection reflects eras of rich delicate fashion. The dresses seem to be influenced by the Elizabethan and Victorian Eras. In the first photo you can see under the highly decorated head cage of the model the hairstyle has techniques influenced of the 16th century. The beautiful dresses represent the colour of the riches of black, white and of course gold. The dresses were highly decorated with gold thread embroidered, pearls and ruffs around the neck. 
https://kennydavisdesign.wordpress.com/category/fashion/


Wednesday, 12 November 2014

Hair Inspiration development for my design for the Final Assessment

As our assessment is approaching in the next few weeks I have started thinking about gathering photos together that I would like to use as my design. I've recently be looking at post's ive blogged about and the artists and designers that have incorporated the Elizabethan era. Below I have posted a few hair designs that I really like, the majority of them are from Chanel catwalks and another design is from the film Elizabeth 1. When creating a hair design for the assessment, I have to draw/ mood board photos and write how to create the design, then with my assessment partner we have to swap designs and she will have to create the Elizabethan hairstyle I create on me. Recently me and my partner have been working together so we can get familiar with each others hair and our ability. I'm starting to gather ideas and thoughts of what I want to create, this will incorporate designer and photo inspiration and techniques we've learnt or created in our studio session.


http://www.pinterest.com/ekhamett/final-major-project-inspiration/
The french plaits incorporated into this Elizabethan hair design is just amazing, the plaits are sectioned amazing and so neat, it just looks to die for. This Chanel pre fall 2013 hairstyles was a big hit on the runway as all the models hair design who was created by the amazing Sam McKnight was based around the Elizabethan Era. In this photo the technique I like is the French plaits into the beehive at the top, this design has inspired me a lot and I would like to incorporate the French plait into my contemporary Elizabethan design. 


http://beautyhigh.com/chanel-prefall-2013-hair-heights/
I really like the height of this hair design and the beehive shape, I like how the beehive contains waves to give it volume. I could incorporate this style into my design, by designing a beehive that's potentially been crimped to create volume.

http://www.pinterest.com/zitong/fashion-chanel-pre-fall-2013-edinburgh/
I really like the French plait that comes up the side of the head and joins into the beehive, it gives a very contemporary Elizabethan feel to the hairstyle. 


http://selahdor.com/blog1/?p=908
I really like this extreme slick back contemporary heart shaped beehive with the French plait going through the middle of the hair. I like how strong the design looks however I would design more of a round heart shape on each side to make it a little more Elizabethan. (Chanel, spring, 2010) 

http://www.pinterest.com/daniellagitto/doro/
The above Chanel design then reminds me of this hairstyle worn by Queen Elizabeth in the film Elizabeth 1. This is slightly more of a historical design as the style was set for the time period of the 16th century. However I like the division between the hair in the middle as the style looks very different and looks similar to the Chanel 2010 catwalk. 


Wiggle Plait Incorporated into an Elizabethan Hair Design - Assessment Practising

 Wiggle plait incorporated into Elizabethan hair design:


After creating the wiggle plait my assessment partner and I which we are working together got a lot of inspiration from this technique. I'm still working on my assessment partner this is to prepare me for the timed assessment. This is now the second time I've worked on her hair and I definitely felt more comfortable working with her hair. When told to create a contemporary Elizabethan design, I got straight into working on the hair after we thought of what I was going to create on the hair incorporating a wiggle plait. This time working on the hair it was slightly oilier this time which made the hair a little more slippery however was still good to work with as bobby pins can be placed through my models braids. This time I wanted to experiment with creating one large egg shaped beehive as the time before I created a heart shape beehive which included two rats. This time I used one rats and it was basically a ball shape, it was a pair of tights filled with couch roll.


Once I had located my padding, I started with creating the beehive, as I learnt from before the part that takes up most of the time is creating the beehive, this is because my model has so much hair, and it’s very thick and long. This means when creating the beehive I have to section the hair out and grip up a few braids at a time otherwise the weight of the hair in one go will pull it down and it won’t be secure. I section to front of the hair that I wanted to keep out and the bottom back of the hair I wanted to keep out as well. When placing the rats on her head I took a braid from the front and one from the back and tied and knot and the top and the same with the sides, this made the hair look like a tied parcel. I then gripped the hair to the roots of her braids and the braids to the padding to create security. I then purely started grabbing each bit of hair from each side and started building it up make sure the padding was covered and the hair was secure to the padding and her head. Once all the hair was gripped into place for the beehive which took most of the time up as there is so much of it, I wanted to start on the front of the hair.


This is where I wanted to incorporate the wiggle plait into my design. I sectioned the hair at the start before creating the beehive to make sure I have sets of threes at the front to create the wiggle plait. I basically started plaiting the hair and then when it came to the end of the hair I pulled the two strands up to create the plait. This gave a very thick and textured look as I was plaiting hair that was already plaited which gave an amazing texture and three dimensional look to the hair. I couldn't carry on plaiting the rest of the section as the strands were too thin at the end of the hair and the one stand was too thick so I left it like that. I then pulled the wiggle plait of the head with the end strand and gripped it into the beehive as well as the long strand of hair left over. I left enough strands to create four wiggle plaits on each side. I started form the middle of the head where I created a middle parting (very Elizabethan) and then worked my way down the side plaiting each one and gripping it to the beehive. When I came to the last piece I was playing around with the placement of the plait and was originally think of doing something to cover the hair at the front this is when we pulled the plait over to connect the middle and it looked really good and framed the front of the hair and felt very contemporary Elizabethan. I then completed the same on the other side. For the back of the hair I wanted to leave it down, this lengthen and expands the design so it doesn't all bulked up on the top, I think keeping it partly down still is very Elizabethan as they would often leave the bottom part down, however my models just looks very modern and contemporary as its all braided.


Overall I'm very happy with outcome of this design as it contained a lot of Elizabethan elements but a modern interpretation of the era. I felt the plait gave a unique, textured look to the hair instead of creating the traditional plaits which makes it very contemporary. I definitely feel much more confident with working on my models hair as all I need to do is plan the structure, section the hair, and layer it up. The hardest part is probably the beehive however this time I feel I worked much better than the heart beehive on my last hair design as I felt more confident to do it to time. Overall my time was about an hour and 20 minutes to create the hair style which I would say around and hour of it was structuring the beehive, I want to cut my design down to around an hour and 10/15 minutes, this means just working at a faster pace however still getting precision.